Google Alert - recipe |
- Skinny Sweet and Sour Chicken: Updated <b>Recipe</b>! | Skinny Mom <b>...</b>
- <b>Recipe</b>: Pink Lady apple-pie marshmallows
- Roast Turkey Breast <b>Recipe</b> | Snack Girl
- Poached Eggs in White Wine <b>Recipe</b> - 101 Cookbooks
- Blondies <b>Recipe</b> | The 36th AVENUE
| Skinny Sweet and Sour Chicken: Updated <b>Recipe</b>! | Skinny Mom <b>...</b> Posted: 07 Nov 2013 02:00 AM PST  I never cook Asian cuisine. It really intimidates me for some reason, so when a craving comes up (often), we go out. These frequent stops got me thinking about the actual damage I was doing to my diet. I looked up my go-to dish under the "healthy options" section at our favorite Chinese restaurant, and my favorite meal – sweet and sour chicken – was pushing 500 calories per serving. I had to try to make a better option! This recipe knocks off over 100 calories and is actually better than the restaurant version. Seriously! | ||||
| <b>Recipe</b>: Pink Lady apple-pie marshmallows Posted: 07 Nov 2013 01:22 AM PST by Lucy Miller 07th November 2013 08:57:41 Tastes just like apple pie - but fat free. Is there anything better in a dessert? Probably not...
Prep time: 20 minutes to make, plus cooling Cooking time: 10 minutes to cook, plus several hours to set You will need 20cm square baking tin Non-stick cooking spray or a little vegetable oil 2 tbsp icing sugar mixed with 2 tbsp cornflour A free standing food mixer with a whisk attachment A sugar thermometer (handy but not essential) For the apples: 3 Pink Lady apples, cored & finely chopped Juice of 1 lemon 200ml cold water 1 tsp ground cinnamon For the marshmallow base: 16g (approx. 8 sheets) leaf gelatine 2 large egg whites 500g granulated sugar 250ml cold water What to do 1. Prepare the tin by spraying lightly all over with non-stick cooking spray or brushing with a little vegetable oil. Add a good tablespoon of the icing sugar and cornflour coating to the tin and tap it around the base and sides so it is evenly covered. Set aside. 2. Place the apples in a saucepan with the lemon juice, water and cinnamon. Simmer, covered, until the apples are soft, stirring once or twice. Press gently with the back of wooden spoon to break them up a bit - you are looking for a fairly thick slightly lumpy apple puree - if it is too watery, simmer a little longer without the lid. Set aside to go completely cold before you go onward with the recipe. 3. Add the gelatine sheets one at a time (to prevent them clumping together) to a shallow bowl of cold water and set aside to soften. 4. Pour the egg whites into the clean bowl of a food mixer and whisk until they hold stiff peaks. Turn off the mixer while you make the syrup. 5. Put the sugar and water into a heavy-based pan and warm over a low heat, stirring until the sugar has completely dissolved. Stand a sugar thermometer in the pan, increase the heat to medium-high and bring up to the boil. Allow to bubble away, undisturbed, for around 15 minutes until the temperature reads 122°C. This is what is known as the 'firm ball' stage. If you don't have a sugar thermometer, drop a teaspoon of hot syrup into a glass of cold water. It should form a firm 'toffee-ish' ball that holds its shape. Remove the thermometer from the pan and leave it on a chopping board or plate to cool down. 6. With the mixer set on low speed, start to beat the egg whites once more. Add the hot syrup in a steady trickle, mixing continuously as you pour. As soon as all the syrup has been added, increase the speed to maximum. Remove the leaves of gelatine from the cold water, giving them a little squeeze dry, then drop them into the mixer as it is turning and whisk on high speed for 10 minutes. The mixture should be thick, shiny, and just about pourable. 7. Add the cold apple and beat again for a half a minute or so until it's completely combined. Scrape into the prepared tin and level with the flat of a table knife. Sift over another tablespoon or so of the coating in an even layer and leave to set, uncovered and in a cool place, but not in the fridge, for 4–6 hours (or overnight). 8. When the marshmallow has set, sprinkle a little more of the icing sugar and cornflour coating on to the surface of a chopping board. Slide a table knife around the tin to release the marshmallow. Turn out on to the board and, using a sharp knife greased with a little non-stick cooking spray, cut into squares. Toss the squares in the rest of the coating so they are evenly covered. 9. These marshmallows will keep for about 5-7 days stored in an airtight tin, sprinkled all over with plenty of the icing sugar/cornflour coating. 10. Serve with Honey Dried Pink Lady Apple Crisps.    7 weird 'practical' fashion solutions Comment: The Problem with Orphanage Tourism Recipe: Pink Lady apple-pie marshmallows Album Review: The Lumineers - The Lumineers (Deluxe Edition) 10 things to do in Berlin New clip released of upcoming adaptation of The Book Thief 7 ways to feel more positive every day 6 films that changed cinema forever Recipe: Indonesian braised Chicken in sweet Soy Sauce with Tenderstem Coconut Rice TNS Mix Series: Parachute Youth Theatre Review: Evita The Science Behind Fireworks Comment: The Problem with Orphanage Tourism Recipe: Pink Lady apple-pie marshmallows The Science Behind Fireworks Comment: Student wins Halloween costume comp with blackface - so, when is dark humour just bad taste? Bonfire Recipe: Pink Lady chocolate apples The 20 Scariest Computer Game Characters of All-time... Part 2 Bonfire Night Recipe: Pink Lady Apple Toffee Tart Kiss and tell exes, chickens, Eurovision regrets... life according to Katie Price The 20 Scariest Computer Game Characters of All-time... Part 1 Halloween Makeup Guide - Face Melt | ||||
| Roast Turkey Breast <b>Recipe</b> | Snack Girl Posted: 07 Nov 2013 12:39 AM PST November 7, 2013 |
 Makes: 36 large squares
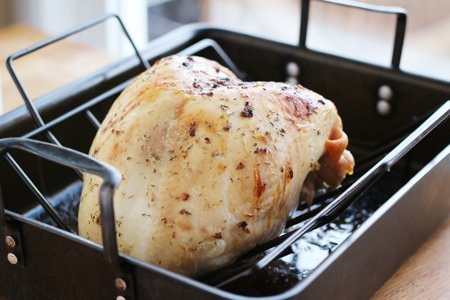


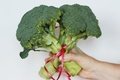 | An Easy and Innovative Hostess Gift: The Brocquet Nothing says "I want you to live a long time" like a Brocquet.... read more |
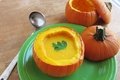 | Festive and Healthy: Butternut Squash Soup in Pumpkin Bowls As we get ready to launch into holiday mode, Snack Girl is on the look out for lighter fare…. read more |
 Share with friends
 - Print
- ‹ Older Newer ›
Get new posts by email (it's free)
1 Comment:
Poached Eggs in White Wine <b>Recipe</b> - 101 Cookbooks
Posted: 07 Nov 2013 12:17 AM PST
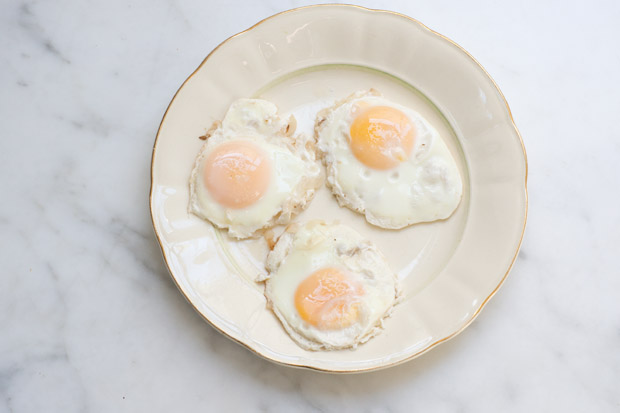
I find myself poaching eggs two or three times a week. And, I know it seems obvious, but I sometimes need a nudge to poach them in something other than water. All sorts of broths and infusions are fair game, it's funny that I don't branch out more often. These, for example, were eggs poached in white wine accented with minced shallots and herbs. A simple twist that immediately transformed the humble poached egg into something just a hint special and unexpected. The nudge came from a tiny cookery volume titled The Flavors of France Volume II, published by Hastings House in 1964. Often, before I leave on a trip, I find myself cooking from cookbooks related to my pending destination, and I picked up this little gem in a thrift store in Napa, California years ago. It charmingly juxtaposes French regional architectural photos with regional recipes. This was a twist on an Oeufs Poches au Vin Rouge recipe, that I tweaked to my liking - using white wine, simplifying the instructions, and serving it open-faced on toasted bread.
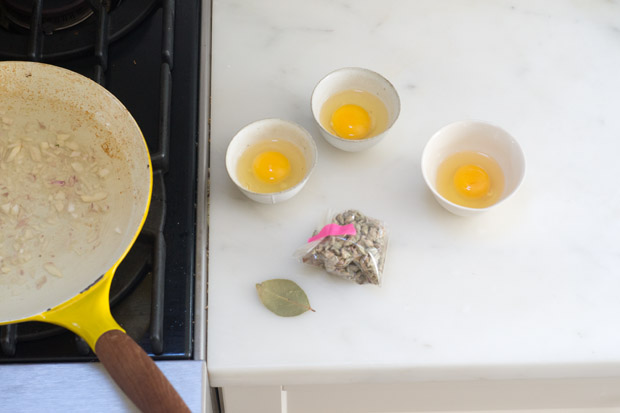
Depending on the size of your pan, it's a shallow poach. You use the remaining poaching liquid to fashion a quick sauce after the eggs have set.
Making my way back from France - in the meantime, I'm imagining you might enjoy these not just on bread, but also, on top of a fall root vegetable gratin, or a chunky potato stew, or alongside a robust kale salad.....xo -h
Use a white wine here that you wouldn't mind drinking the remainder of.
1 cup dry white wine
1 cup water
2 shallots, minced
1 bay leaf
a pinch of thyme
1/4 teaspoon fine grain sea salt
2-4 large eggs1 tablespoon butter, room temperature
2 teaspoons flourto serve: toasted bread, avocado, chives
In a large skillet or saucepan over medium-high heat combine the wine, water, shallots, bay leaf, thyme, and salt. Boil for five minutes. Dial back the heat a bit, before carefully cracking eggs into the skillet. Cover and simmer for another five minutes or so - until the eggs whites are opaque, and the yolks are set to your liking. Once poached, remove the eggs with a slotted spoon from the skillet and set aside. Cook the liquid in the pan down a bit more, until you have about 1/2 cup of liquid left, then strain the liquid into a small saucepan. Whisk the butter and flour into a paste, then add this to the strained sauce, stirring until smooth, taste and add a bit of salt if needed.
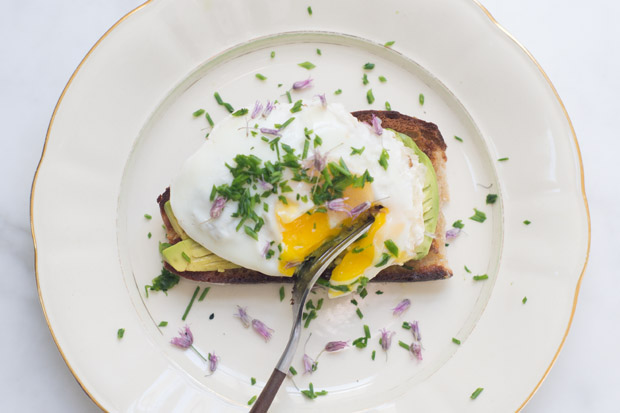
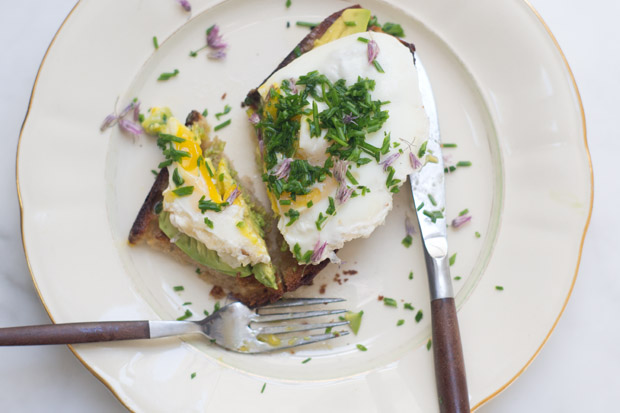
Serve each egg on a piece of toast over a bit of smashed avocado, drizzled with a bit of sauce, and sprinkled with chives.
Serves 2-4.
Prep time: 5 min - Cook time: 10 min
Blondies <b>Recipe</b> | The 36th AVENUE
Posted: 07 Nov 2013 12:00 AM PST

Hi everyone! I'm Gina from Kleinworth & Co. I'm so excited to be here posting my first recipe as a monthly contributor for one of my most favorite places- The 36th Avenue. This time of year is so fun for getting creative in the kitchen. I love getting in there with my kids & seeing what we can come up with using some of our favorite seasonal ingredients. With Thanksgiving around the corner, we decided to blend traditional flavors of pumpkin & cinnamon into a very tasty bite sized snack.

I was so thrilled when I found the little Cinnamon Chips at the store. Perfect for this time of year.
(Since cinnamon is my son's favorite flavor I will be using them for as long as I can find them – hopefully year round)

Instead of a traditional size blondie I thought it would be fun to make them more bite sized.
Just pop & go.
Pumpkin CinnaChip Blondies
Author: Gina at kleinworthco.com
Recipe type: Dessert
Cuisine: American
Ingredients
- 9 tbsp butter
- 1-2/3 cup all-purpose flour
- 1 tsp baking soda
- ¾ tsp coarse sea salt
- 1 cup packed brown sugar
- 2 eggs
- 1 tsp vanilla
- ¾ bag cinnamon chips
- 4 tbsp Slow Cooker Pumpkin Butter divided
Instructions
- Line an 8×8 glass baking dish with parchment & spray lightly with cooking spray. Allow sides to hang over a little. Set aside.
- Preheat oven to 325 degrees.
- In mixer- combine butter & brown sugar. Beat well until light & fluffy & well combined.
- Add in eggs & vanilla- mix until just combined
- Add in flour, baking soda & salt – beat well.
- Stir in ½ the bag of cinnamon chips
- Fold in 2 tbsp pumpkin butter.
- Transfer to prepared pan.
- Spread remaining pumpkin butter over top in light layer
- Sprinkle with desired amount of remaining cinnamon chips
- Bake 55-65 minutes or until toothpick test is mostly clean.
- Allow to cool 30 minutes in pan.
- Remove with parchment by pulling up & cool for an additional 1 hour.
- Cut & store in airtight container.
3.2.2124

The spices in the Gingered Pumpkin Butter throughout adds a great depth in flavors.
I hope these are a hit in your house as much as they are in mine.
Thank you Desiree for having me today.
I'm looking forward to sharing another family favorite with you next month.
Want more fall recipes….. here are some that are always on the menu in our house.
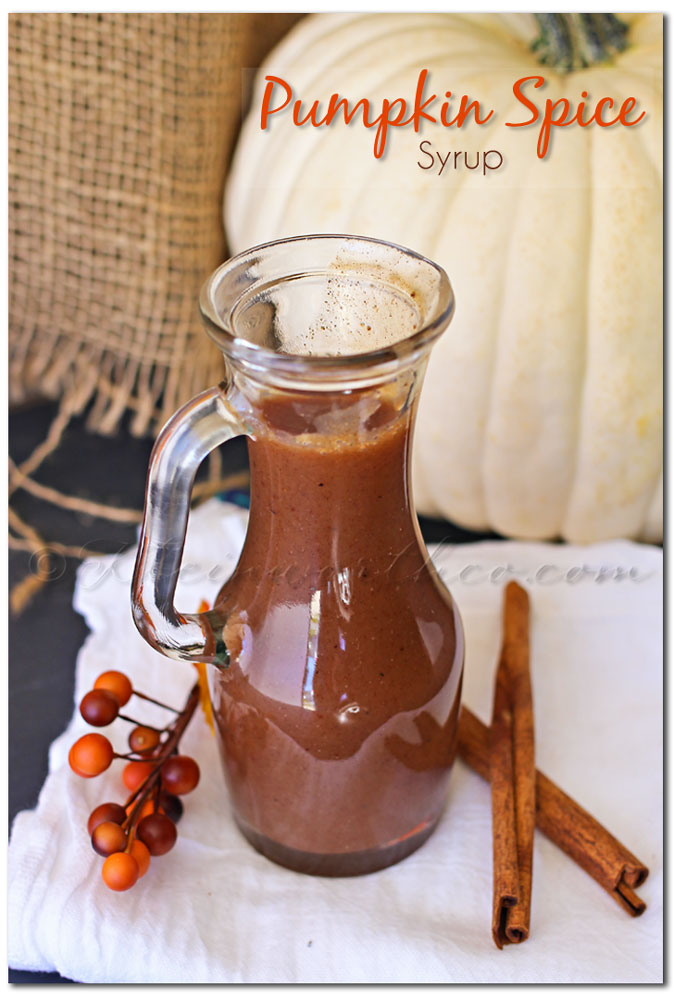
Pumpkin Spice Syrup – good on just about anything. Pancakes, waffles, ice cream.
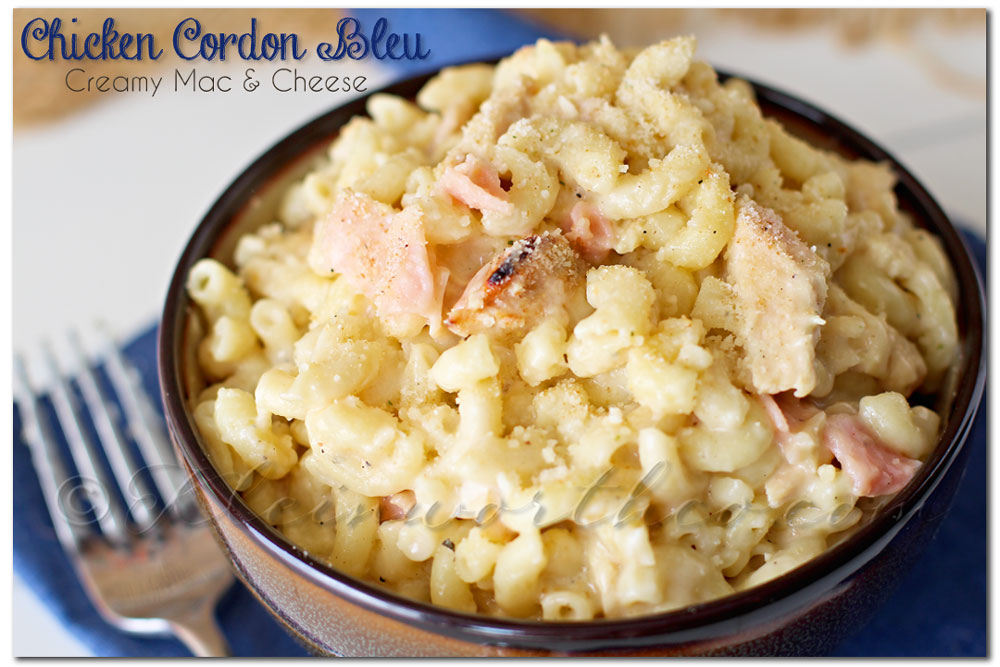
Chicken Cordon Bleu is the perfect comfort food on those cool fall nights.

Best Firehouse Chili - you don't want to miss out on this one. It's fabulous!
I can't even tell you how happy I am to have Gina as part of our team.
You are going to love her delicious recipes and her sweet personality.
I adore her!
You can connect with Gina via Blog, Twitter, Google+, Instagram & Pinterest

Gina
Gina is a mom to 3, wife to a fire chief, photographer & homeschooler. Within the last year she relocated with her family to Northern Idaho after 12 long years living in various parts of the Nevada desert. Gina is a Southern California beach native with a passion for food photography, blogging, baking & getting crafty with re-purposing & up-cycling on a budget.
| You are subscribed to email updates from Google Alert - recipe To stop receiving these emails, you may unsubscribe now. | Email delivery powered by Google |
| Google Inc., 20 West Kinzie, Chicago IL USA 60610 | |
{ 0 Comment... Views All / Send Comment! }
Posting Komentar