Google Alert - recipe |
- Gramma Good's Marvelous Lentil Soup <b>Recipe</b>
- Make mealtime fun with alfredo <b>recipe</b>
- Shasher's Life: A Slice of Heaven Cake #<b>recipe</b>
- Natural All Purpose Cleaner <b>Recipe</b> & Free Printable - Lovely Greens
- Healthy <b>Recipe</b> Center is Launched Online for Health Educators and <b>...</b>
- The Best Biscotti <b>Recipe</b> | Brown Eyed Baker
| Gramma Good's Marvelous Lentil Soup <b>Recipe</b> Posted: 07 Jan 2014 02:18 AM PST This recipe makes a big batch that will last for days. I prefer French lentils, which are nice and meaty and cook a bit faster, but you could also use your choice of green or red lentils. I love cooking with lentils because they have such a great helping of protein and fiber, and are really nourishing for people of all ages. I love this recipe because it's so simple. After the preparation, it's only a few steps until you're eating delicious and hearty soup. You sauté up some garlic, onions, and tomatoes, throw in the lentils and water, boil and you're off! This will make enough for about three people, so feel free to multiply the recipe as needed. As always, enjoy! Gramma Good's Marvelous Lentil Soup Recipe
Author: Gramma Good
3.2.1275 |
| Make mealtime fun with alfredo <b>recipe</b> Posted: 07 Jan 2014 01:45 AM PST Reset your passwordEnter your email and we will send you a link to reset your password. You must have browser cookies enabled to view our site. It's possible that your browser cookies are turned off. Read our FAQ page to find out how to enable cookies in your browser.
Account issueWe're sorry, your shared access privileges have been removed by the subscriber. You can still look at a limited number of articles per month.
Account issueWe're sorry, this account no longer has full access. You can still look at a limited number of articles per month. |
| Shasher's Life: A Slice of Heaven Cake #<b>recipe</b> Posted: 07 Jan 2014 01:25 AM PST I asked a friend of mine for a quick and easy but super yummy dessert recipe to use in our next church newsletter, she sent me this one... ENJOY! A Slice of Heaven Cake  What's In It:
Bake the cake according to directions in 9x13 inch pan. Cool for 5 minutes, using the handle of a wooden spoon poke holes into cake, let cake cool for about a 1/2 hour until warm. Slowly pour sweetened milk over cake, letting it soak into holes, drizzle caramel over the cake. Let cake cool completely (you may refrigerate it to cool faster just cover well). Top cake with cool whip, decorate with candy & drizzle with caramel. YUM!! |
| Natural All Purpose Cleaner <b>Recipe</b> & Free Printable - Lovely Greens Posted: 07 Jan 2014 12:57 AM PST  I've just moved and in clearing the old house I've been finding all kinds of hidden dust, cobwebs, and dribbles, among secret stashes of cat toys and treasures! You think your home is clean until you start moving semi-permanent pieces and climbing up to see the tops of cabinets and shelves. So you can probably imagine that I'm going through a lot of all purpose spray cleaning those surfaces and you'd be right - except the spray I use might not be the one you might be thinking of. Several years ago I stopped buying commercial kitchen spray and instead have been making my own. It's the easiest and most cost effective way that I've found to jump-start goals to creating a more natural home. At first I made a version using just vinegar and water and though it performed well, it did smell a bit like a chippy shop for about ten minutes after. The addition of essential oil works wonders on the scent though and there are varieties that can even help with destroying germs and bacteria.  The main ingredient in my kitchen spray is ordinary distilled malt vinegar that I purchase from our local cash and carry. It's inexpensive, colourless, and completely natural. Vinegar is harmless to people and pets but is deadly to bacteria, viruses, and fungus. In one study corraborated by Heinz spokesman Michael Mullen, it was found that just a 5% solution of distilled vinegar was effective in killing 99% of bacteria, 82% of mold, and 80% of germs/viruses, all without the help of harmful chemicals. Vinegar is also used as an additive to commercial cleaners to help create a 'streak-free shine' as seen on the below label. In my years of using this vinegar cleaning spray I've never once thought that it didn't have the power or effectiveness of commercial products. Sometimes when you switch over to homemade there's a period of adjustment and wishing for the old store-bought version. Not so with this! As a soap maker I also find this spray handy since vinegar helps to neutralize any lye granules or fresh soap splatters that might be lingering on kitchen surfaces.  Natural All Purpose Cleaner - Empty Spray Bottle - Distilled White Vinegar and/or Apple Cider Vinegar - Water - Essential oil - I use Rosemary & Citronella (matching the scent of my Kitchen and Garden Hand Soap) but others that have a nice scent and antibacterial properties include Lavender, Tea Tree, and Lemon. 1. With a black sharpie, mark the back of your spray bottle approximately 2/3 the way up and beside the mark write 'Vinegar'. Another 1/3 the way up and make another mark and write 'Water'. Using a funnel, fill your spray bottle up with those two ingredients, starting first with vinegar. 2. Add 1/2 to 1 tsp of your preferred essential oil to the bottle. 3. Since the essential oils like to float to the top, make sure to shake the bottle before each use. Spray away and wipe up as you would with any other household cleaner. If you do smell a bit of the vinegar coming through, it will dissipate after just a few minutes. And if you'd like to use the same label as I do, with recipe instructions on the front, download the below image which you can print out and place on your bottle. A few dollops of glue might work but I just print directly onto inexpensive, self-adhesive paper.    |
| Healthy <b>Recipe</b> Center is Launched Online for Health Educators and <b>...</b> Posted: 07 Jan 2014 12:15 AM PST Louisville, CO (PRWEB) January 07, 2014 Food and Health Communications, Inc has just launched a new online healthy recipe center for nutrition educators, health professionals, and consumers. Each recipe features a nutrition facts panel with a full recipe analysis from the USDA nutrient database. This makes it easy for people trying to watch calories, fiber, or sodium to find a delicious meal that fits many health goals. It is always easy to find just the right recipe. Choose from 1,086 free recipes in over 30 categories. Category choices feature healthful ingredients like fruits, vegetables, whole grains and beans. And they also feature specific months to capture seasonal ingredients. They can be searched by a meal course like breakfast, dinner, soup or dessert. The enhanced photo navigation is attractive. This hand-built recipe database focuses on user-friendly instructions, gorgeous photos, health benefits, nutrient analysis, and professionally edited instruction. Anyone who wants to make a meal without going to the store can search by ingredients to find fast, easy recipes using items that are already on hand. Dietitians and other educators can use the nutrient search tools to find just the right recipe for clients based on calories, fiber, fat, carbohydrates, sodium and protein. The recipes can be printed or emailed to clients. A PDF tool enables the creation of attractive handouts for each recipe. There are two categories that are very unique and useful for health educators. The first is a cooking demo recipe category, which features recipes that are recommended for cooking demonstrations. The other category is called Chef's Favorites and this enables a user to find the very best recipes by scanning quickly. Chef Judy Doherty, PC II, who founded Food and Health Communications, Inc, prompted the creation of the new online healthy recipe tool. The goal of the recipe center is to offer some of the most delicious recipes to professionals who will use them to improve the lives of their clients. Food and Health Communications also owns the Nutrition Education Store for educators. The recipe database is found on the Food and Health Communications website at http://foodandhealth.com. Click on Recipes in the top orange bar. It can be accessed directly at http://foodandhealth.com/recipes.php. Media and Consumer Inquiries: 800-462-2352 |
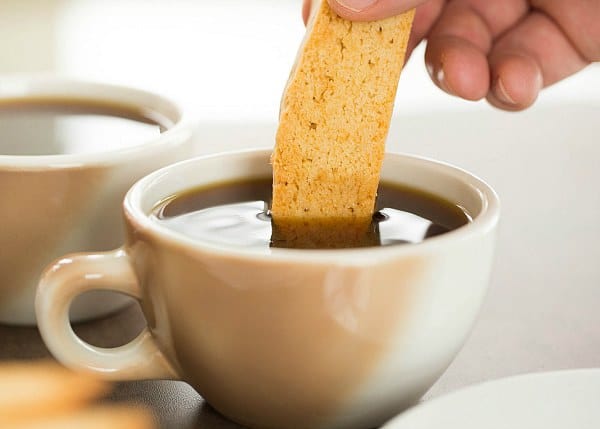
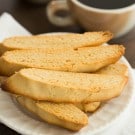
| The Best Biscotti <b>Recipe</b> | Brown Eyed Baker Posted: 07 Jan 2014 12:14 AM PST January 7, 2014 
Most of my grandma's recipes are written like stereotypical grandma-style recipes. There are a list of ingredients and if you're lucky, most of them will have quantities next to them, but inevitably, some do not. Since my grandma passed away a little over two years ago, my mom and I have taken turns going through her stack of recipes. Her biscotti recipe, in particular, was treasured by everyone in our family. Growing up, I don't think there was ever a time that I went to her house and her ceramic cookie jar wasn't filled to the brim with biscotti. If you just so happened to reach in and grab the last one, not to worry… Grandma would tell you to "go over there on the steps and grab the big tin, there are more in there." Because, of course there were. That's how Italian grandma's roll. Unfortunately, none of us ever baked right alongside my grandma when she made her biscotti (they always magically appeared!), and her recipe was rather cryptic – no amount of flour, no oven time, no flavoring amount. Last Christmas, my mom and I tackled the trial and error project of getting the recipe as close as we could. After a few different batches, a lot of dough-feeling and experimenting with flavorings, we finally nailed it!
One of the unique things that my grandma did with her biscotti was to use butternut flavoring as opposed to the traditional anise. I personally love anise, but my extended family is split at best on it, and I think more people than not dislike it. Since she always aimed to please, my grandma stopped using anise and adopted the vanilla butternut flavoring, which became her signature biscotti flavor. My grandma would buy the imitation vanilla butter & nut flavoring from the small grocery store in her town, but if you want to amp up the flavor, you could buy pure vanilla-butternut flavor from King Arthur Flour. The other thing the family had always been split on was nuts. Some loved chopped walnuts in the biscotti, while others wouldn't touch them if they had nuts. Again wanting everyone to be happy, my grandma would make half of her batches with nuts and the other half without. When you make these, feel free to throw them in or leave them out, or use your favorite nut.
When I was younger, I would often pour myself a half cup of coffee, then sit at the table and dunk, dunk, dunk. I've never been a coffee drinker, but to me, there is no better way to enjoy a good biscotti than by dunking it in a cup of coffee. I wish my grandma were still around and we could sit at her dining room table or mine and chat over a plate of biscotti and cups of coffee. One day.
One year ago: Soft Pretzels and Oatmeal-Chocolate Chip Cookies
|


| You are subscribed to email updates from Google Alert - recipe To stop receiving these emails, you may unsubscribe now. | Email delivery powered by Google |
| Google Inc., 20 West Kinzie, Chicago IL USA 60610 | |
{ 0 Comment... Views All / Send Comment! }
Posting Komentar